I don't know about you, but I love absolutely any reason to style, re-design, or decorate! I love it all and my favorite part is always in the details. But my gosh, my mind starts reeling and suddenly everything starts adding up. DIY is usually always my go-to. Because its always affordable and I'm one of those weirdos who actually really enjoys every part of it. This year I've really been loving the Scandinavian/Nordic Christmas decor. (thank you Pinterest) Simple and neutral, yet still festive and fun! We really did not have room in our budget to do much extra decor shopping so I came up with some really affordable DIY decor items as well as some inexpensive items I purchased and incorporated. I thought I'd share, in case anyone else wants to save a little money. To all you non-crafters, don't stop reading, these ideas are simple and totally doable for any level crafter, non-crafters included. Hope you all have a very Merry Christmas and Enjoy!
Disclaimer: there is a lot of black and white in my decor this year, hence my love of the Scandinavian look, but the great thing about DIY is that colors are easy to swap in and out, so get creative and add in your favorite colors if you're bored with my neutrals! ;)

First up, those adorable bells! I purchased a pack of two bells from Joanne's for $1.00 and tied some twine through them! Easy Peazy! And they are a cute little addition to any part of the house, ours are on our front door!
Notice those white ornaments above? Those used to be a very chipped shiny red that wasn't so pretty anymore, but a $3.00 bottle of flat white spray paint took them from cheap to chic' real quick!

Those cute little deer and doe? $3.45 at Target in the Kids Toy Section! I purchased 3 because they were buy 2 get 1 free and spray painted one white, with the same flat white paint I used on the ornaments.


The Santa Banner was probably one of my favorites that I created, it was so easy and turned out exactly how I wanted and the best part is that it didn't cost me anything because I used what I had around the house:
1. Left over muslin fabric (purchased at about $1.99 per yard)
2. A wooden kitchen skewer...yes like the kind you use for fruit/meat kabobs
3. Marker or Letter Stickers
4. Bakers Twine, any color! (I always keep a spool of this around because its so universal)
Not into the modern calligraphy trend right now? No problem! Just grab a letter sticker that you like! Could even brighten it up with Gold, Silver or Red letters!


I'm a little obsessed with decorative throw pillows! Luckily, you don't have to break the bank because they happen to be very easy to make, even if you aren't a sewer or don't own a sewing machine.

Each of these fabrics were purchased from Joanne Fabrics, and total cost me about $5.00, always make sure you check their app AND their website for coupons, they always have a bunch!
The black pillow with the tiny reindeer silhouettes and the white flannel, were both a simple sew around each side, then stuffed with the stuffing I had from a few old throw pillows that I no longer used. If you don't have a sewing machine, you could always buy iron-on hemming stitch, it works perfect.
The black pillow was an idea that I had to compliment both fabrics and create a cohesive look. I found a deer head silhouette online, then printed and cut it out as a stencil. Next, I ironed-on the white flannel fabric to Wonder Under adhesive, It's just an iron-on adhesive that is about $2.99 per yard.


This next project was inspired by all of those adorable pom pom garlands that are trendy right now. I've seen a bunch of different colors and kinds and instantly thought of cotton balls and bakers twine! Wouldn't you?! ;)


The cotton balls were .89 cents for 100 and I already had the twine. Little tip: Tie the twine around a kitchen skewer and thread your cotton balls with it. So easy!! The fun thing about this is you can use any color twine or rope or thread, or other colored puff balls, (I use cotton balls to really keep the cost down, but pom pom balls would probably look better) and it can also be used for other holidays or for decor in a nursery. I'll be reusing this one for Jude's playroom!
A great affordable way to decorate your space for any time of the year, is to use quotes or verses, hand-lettered or printed, framed or hung! Did you get all that?! lol!
This one I hand-lettered and put into a frame from the Dollar Tree! But again, if you aren't a calligrapher yourself, you can always choose your favorite font and print our your words from your computer and frame them. Or, you could purchase hand-lettered art like the ones below from ETSY shops! The top one is from Aria Paperie, my sister-in-loves Calligraphy shop, that YOU MUST CHECK OUT!! Little plug there, but its okay because its my blog and I'll plug all I want! ;)
https://www.etsy.com/shop/AriaPaperie?ref=hdr_shop_menuAnd

One of my favorite parts about the Christmas season is receiving Christmas Cards!! Seriously, I love getting them and I keep them displayed well past Christmas! So send them people!! Today we received our first one of the season from our sweet friends, The Kaysens. I usually just tape them to one of our walls, but decided to display them properly this year. I just used decorative push pins that I already had (Target Does It Again) and again....bakers twine...The little red clothespins I had leftover from last year's wrapping paper theme, I purchased them from The Container Store, but you could probably pick them up at any craft store.

Finally, my last little decor tip this Holiday season, involves all things wrapping!
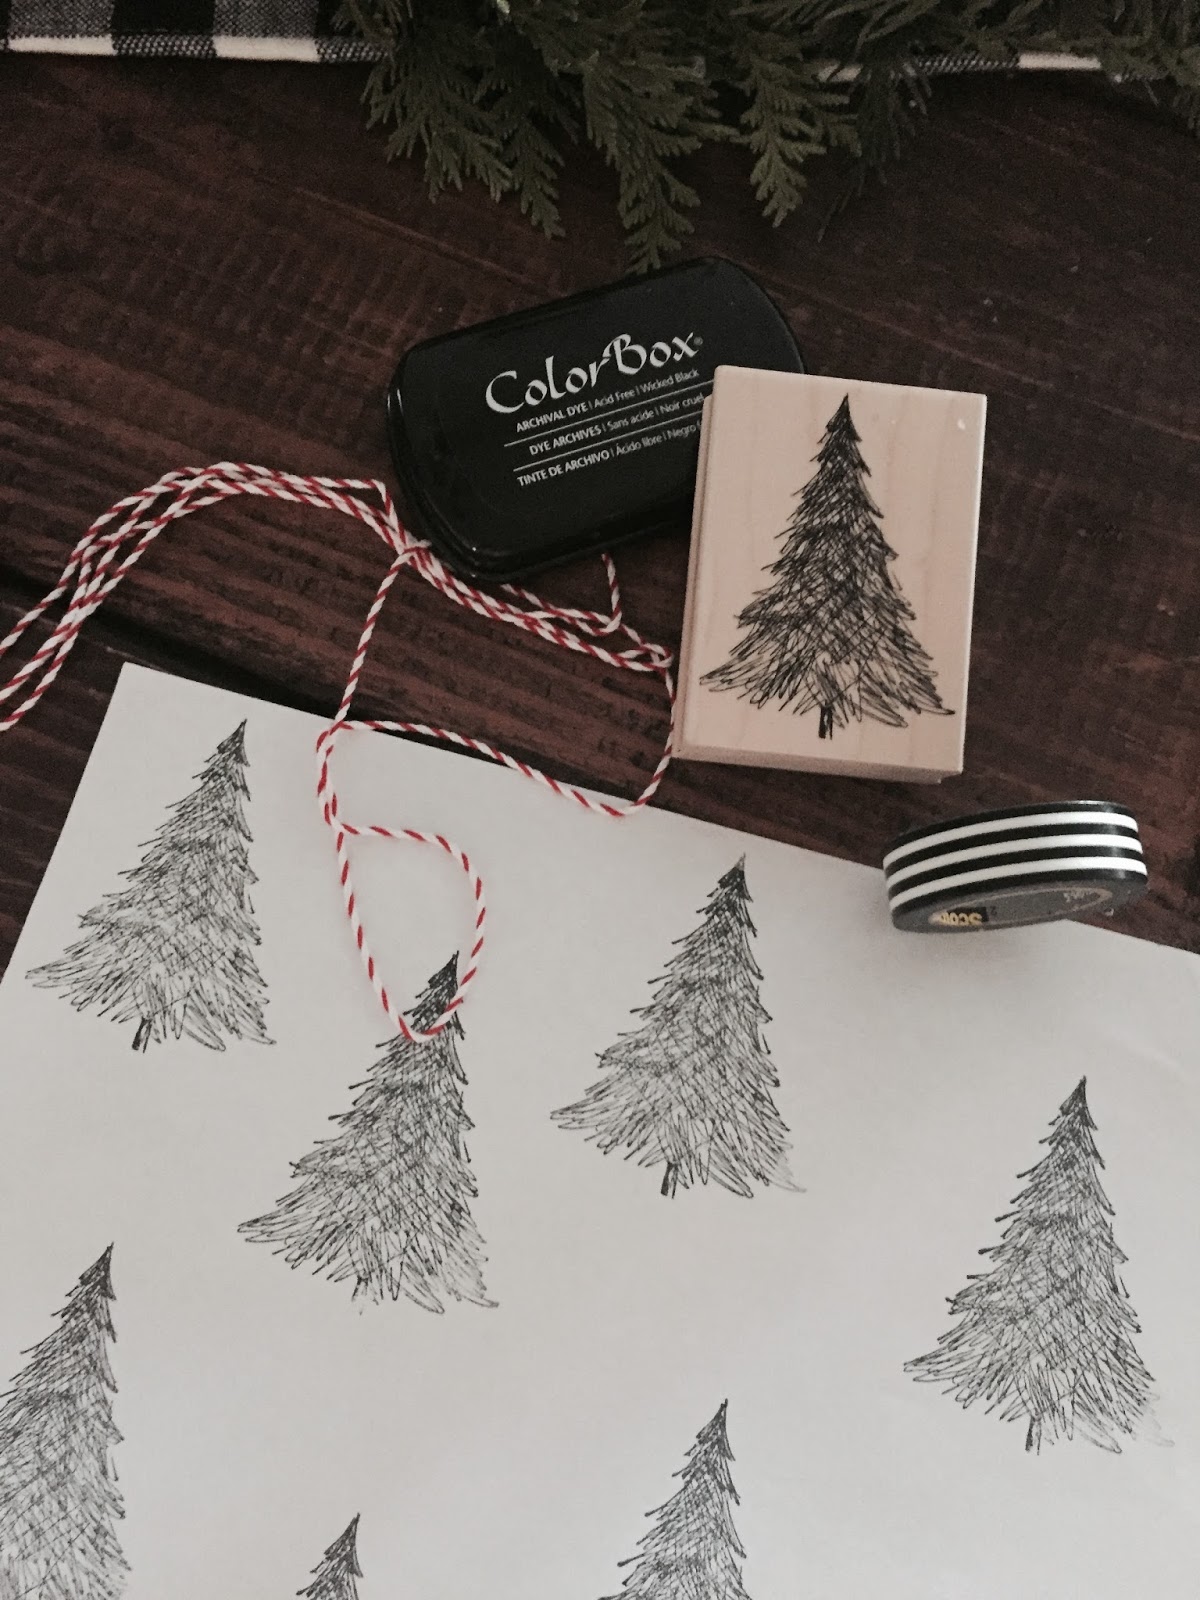
I absolutely LOVE to wrap gifts!! I've even thought about starting a Gift Wrapping service around the Holidays because I love it so much. There are a million directions you could go for gift wrap themes or ideas. This is another easy DIY if you want to keep it simple and affordable, but still keep a little charm.
Grab a cute holiday stamp! I used a Pine Tree stamp. For this I used plain white paper, but my plan is to use kraft paper. I always think that the real beauty is in the details. So instead of using curling ribbon, grab a role of bakers twine or a fun colored yarn! Use a cool designed Washi tape instead of clear tape for the the parts that are really seen!
and That's a Wrap people! See what did there?! Thanks for following along!
24 Days til' Christmas! Happy trimming, decorating and shopping Loves! XO